Hi there!
I’ve teamed up with 19 other talented bloggers to bring you a monthly Thrift Store Decor Upcycle Challenge. Each month we will create a new home decor piece from an item(s) we’ve found at a thrift store, yard sale, resale shop etc. There is no budget or specific theme, so we are free to let our creativity run wild!
Meet the Hosts

Amanda | The Kolb Corner Chelc| Inside the Fox Den
Erlene | My Pinterventures Kim | Made in a Day Sara | Twelve on Main
Debra | Shoppe No. 5 Shirley | Intelligent Domestications
Marie | DIY Adulation Lindsay | Crazy Organized Michelle | Our Crafty Mom
Julie | Live From Julie’s House Dru | Polka Dot Poplars
Maureen | Red Cottage Chronicles Pili | Sweet Things Channell | Hobnail House
Colleen | Life on Kaydeross Creek Ann | Duct Tape and Denim
Paula | Virginia Sweet Pea Sherry | Savvy Apron Stacy | Anastasia Vintage
You can also follow our board on Pinterest for more upcycled decor inspiration!
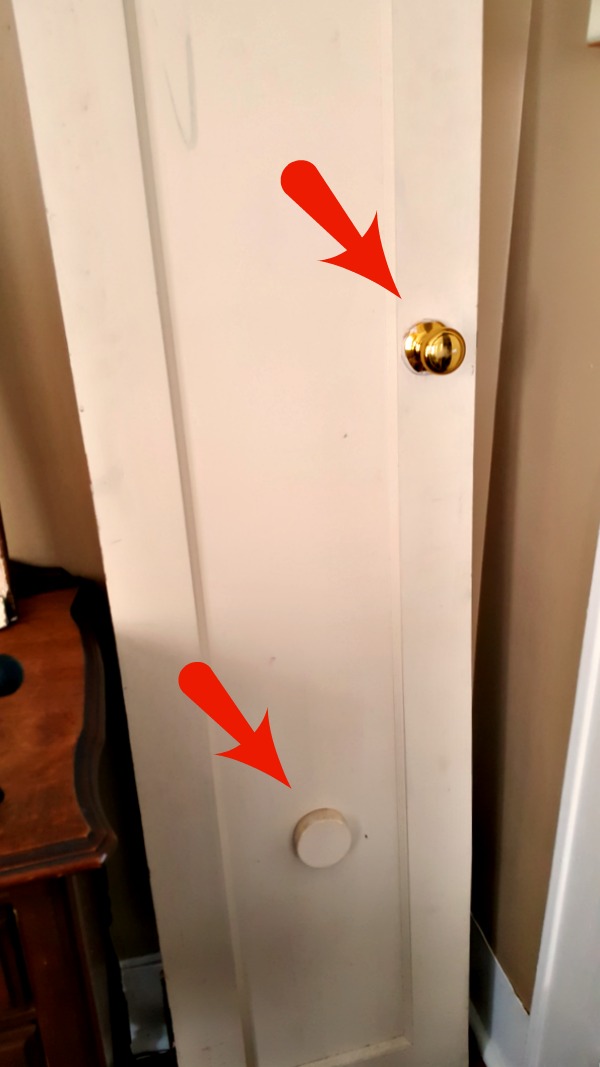
My project this month began with a pair of narrow doors I picked up at the ReStore for 10 bucks. They were solid wood and pretty heavy, but beat up and a little gross.
How do you like the cheap brass knob and lovely retro room freshener?
The other door had a different type of knob mounted in a different spot, so they clearly weren’t being used in the same room. I cleaned them up, did some minor sanding and added some vintage knobs and plates that came off a door I had in stored in my basement.
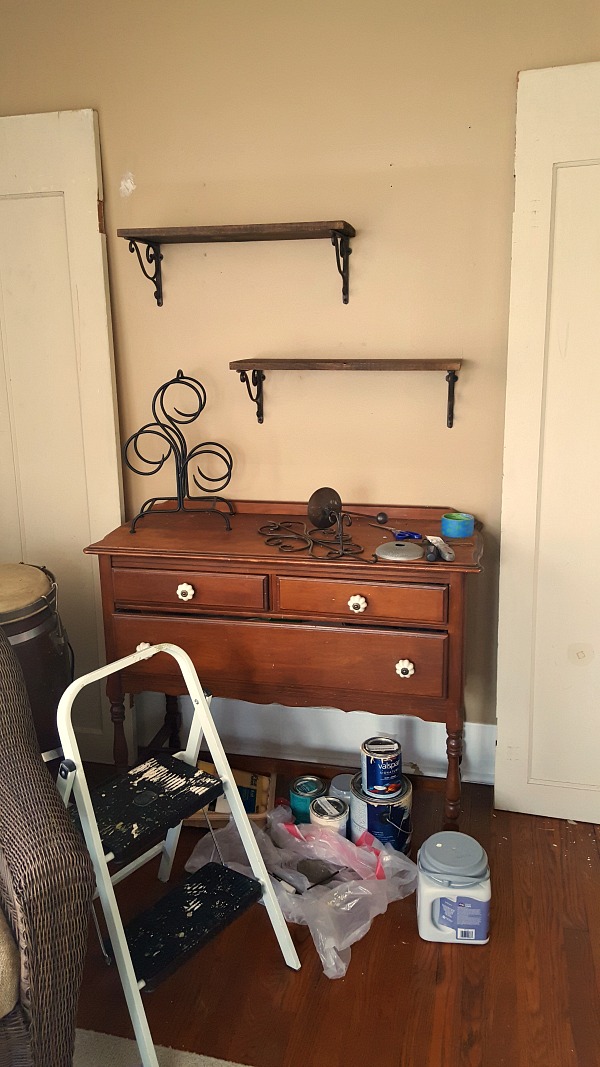
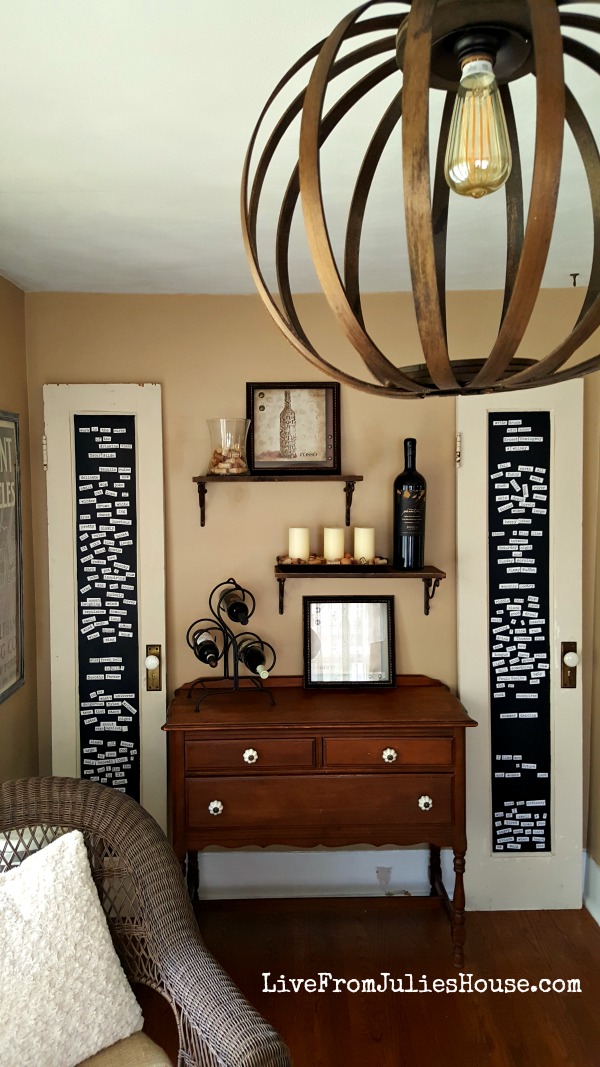
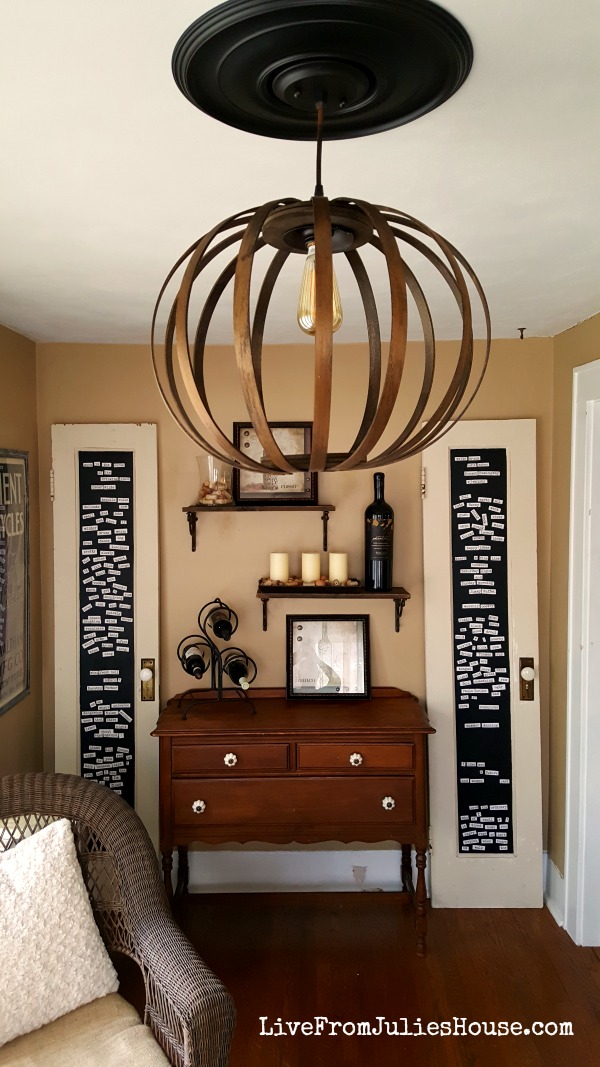
My idea was to use them to flank a small dresser/buffet that I have in my sunroom.
This post contains affiliate links. For my full policy, go HERE.
The sunroom is kind of my nemesis…it’s 14′ long, but only about 6′ deep, and it was originally an exterior porch that a previous owner enclosed. It’s in the front of the house connected to my living room by a set of double French doors, and honestly I don’t use it much unless I have company coming over. I’ve tried out a million different configurations and while most of them weren’t bad, I’ve never been in love with it.
This is the same room I made the West Elm Bentwood Pendant Knock Off for, and I’ve been working on it here and there between other projects. It’s almost done, but I still have a few things to figure out.
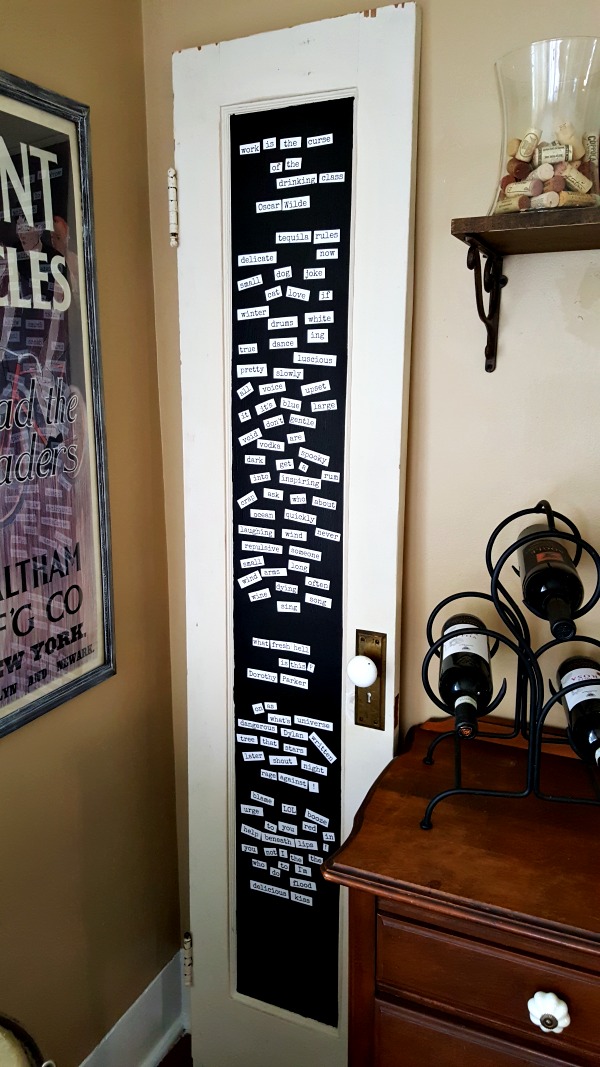
I parked the doors out there for a few weeks while I contemplated what exactly I wanted to do. I was thinking about mounting sconces on them, or just making them big chalkboards, or maybe mirrors, but somewhere along the line I came up with the idea to make them magnetic and create my own magnetic poetry to display quotes.
Whaaaat????
Stick with me.
I used to have magnetic poetry on my fridge, and I always thought it was funny to see the “poetry” people left for me after they visited. When we did the recent kitchen reno, I didn’t put it back up because I thought it was a little clutterly, plus the last thing I need in my tiny kitchen is a cluster of people around the fridge. I thought that since the buffet functions as an auxiliary bar during parties, it would make sense to have something for guests to play with out there. I wanted to be able to put my favorite literary quotes and song lyrics up, without committing having them painted on a wall somewhere…kind of like a temporary tattoo.
Speaking of tattoos (AND my lack of commitment), I thought about getting a tattoo back when I was in high school in the 80’s, well before it was the norm for girls. I never did, mainly because I couldn’t settle on anything I wanted to look at for the rest of my life. I’m so thankful, because I’d probably have something dumb like REO Speedwagon tattoed on my ass. 😉
Anyway – I also wanted to find a way to make the words bigger than the standard teeny-tiny words I had with my old set.
I knew they made magnetic paint, but I’ve never used it, so I figured this would be a good chance to check it out. I picked up a quart of Rustoleum Magnetic Primer and carefully read the directions.
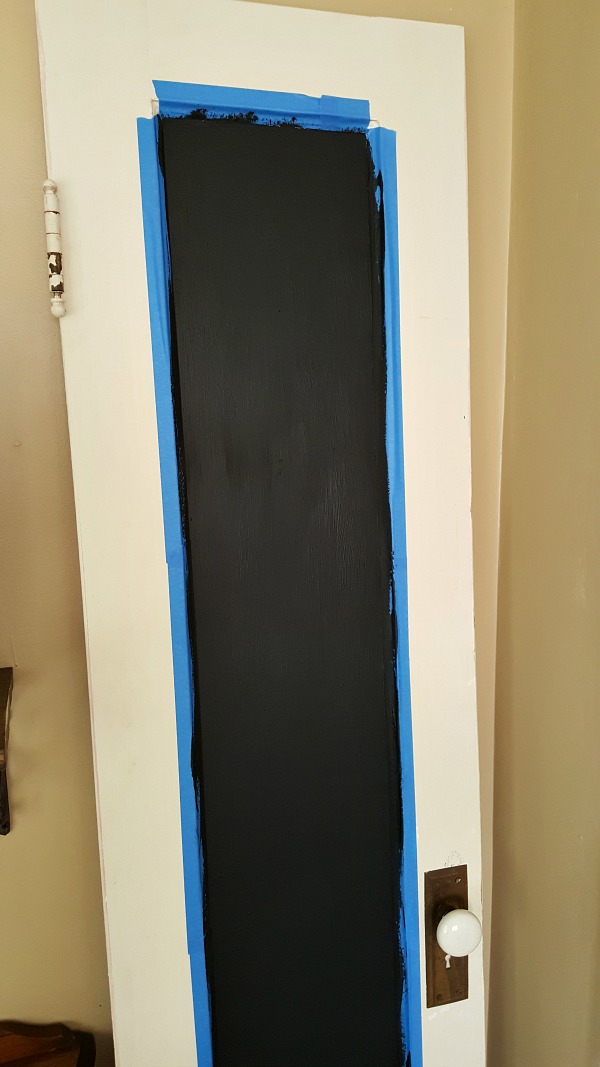
After taping off the edges, I used 2 coats of the magnetic primer, followed by 1 coat of regular chalkboard paint.
Aaaaaaaaand……there were a few issues.
I stupidly forgot to test the door before I used the chalkboard paint, and I discovered pretty quickly that it really didn’t work all that well. Some words stuck, some didn’t. I Googled “magnetic paint” and discovered that it’s not as easy as they would like you to believe to “make any surface magnetic”. I found TONS of terrible reviews and a few tips on how to make it work a little better. Since I wasn’t doing a work station type application where I would be trying to hang up sheets of paper – just lightweight magnets – I decided that it was worth giving it another shot.
I retaped everything and gave it two more coats, followed by one more coat of chalkboard paint, and I now have a pair of doors that my nifty DIY magnetic poetry (I’ll circle back to how I did that) will stick to. Hallelujah!
Tips for Magnetic Paint
- Stir the magnetic paint REALLY well, and then stir it more. The paint contains metal filings and they want to settle to the bottom. You have to get as much of that as you can onto your surface.
- The can suggests using a small foam roller, which I did for my first 2 coats. The 2nd time around I used a brush, mainly because I didn’t have any more foam rollers, and while I think it helped me get a lot more paint onto the doors, there was no avoiding brush marks – my end result is pretty textured, which I don’t love. Definitely use the rollers and just plan on many, many coats.
- Plan to throw out whatever brush or roller you use – it’s not worth trying to clean it up. This paint is very thick and sludgey.
- Use a minimum of four coats, more if you can manage it.
- This probably works best for small surfaces. I cannot imagine trying to cover a wall with this stuff, not to mention the expense.
- Try to do this in warmer weather when you can do it outside or at least open doors and windows – the fumes are pretty strong.
DIY Magnetic Poetry
I came up with a couple of different ways to make my large magnetic poetry. They do sell this ready made by the way, you can find it on Amazon if you’re not inclined to make it yourself:
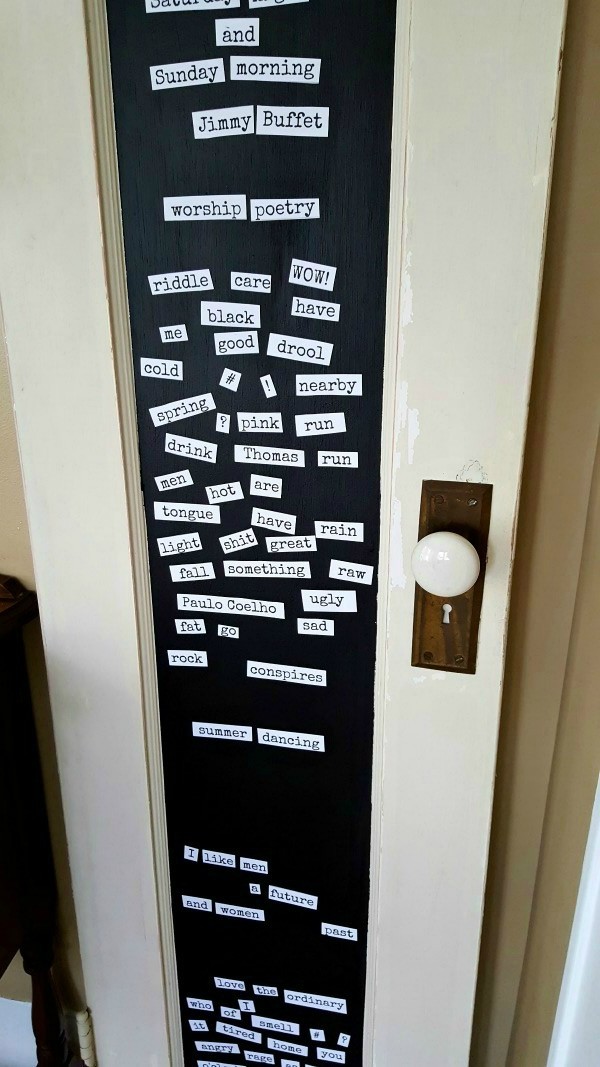
But, my whole idea was to be able to customize my “poetry”. I planned to print up a few sheets of words, have them laminated at my printer, cut them up and add magnets to the backs. I was at my favorite printer (PostNet in Eastwood, if you’re a local reader) inquiring about the lamination, when they told me a brand new product they had just discovered at a trade show – 8.5 x 11″ magnetic sheets. I’m not sure exactly how it works on their end, but I believe they print directly onto them. I cut the sheets up with regular scissors and VOILA!
I purposely wasn’t super careful cutting the words out – I wanted an irregular look. I did the text in PicMonkey using the “Special Elite” font, and I played around with the size until it looked the way I wanted it to. I put in the lyrics and quotes first, then filled in with random words to get as much as I could onto each sheet.
If you have children in your house, I think you could have a lot of fun coming up with a kid-friendly version.
My current selection:
“What fresh hell is this?” – Dorothy Parker
“I like men with a future and women with a past” – Oscar Wilde
“Write drunk, edit sober” Ernest Hemingway
“If you want something bad enough, the entire universe conspires to help you you get it” – Paulo Coelho
“Work is the curse of the drinking class” – Oscar Wilde
“Rage, rage against the dying of the light” – Dylan Thomas
“There is a fine line between Saturday night and Sunday morning” – Jimmy Buffet
I figure I can add more quotes as the inspiration hits me.
I think I want to hang something off the door knobs, but I’m not quite sure what….any ideas?
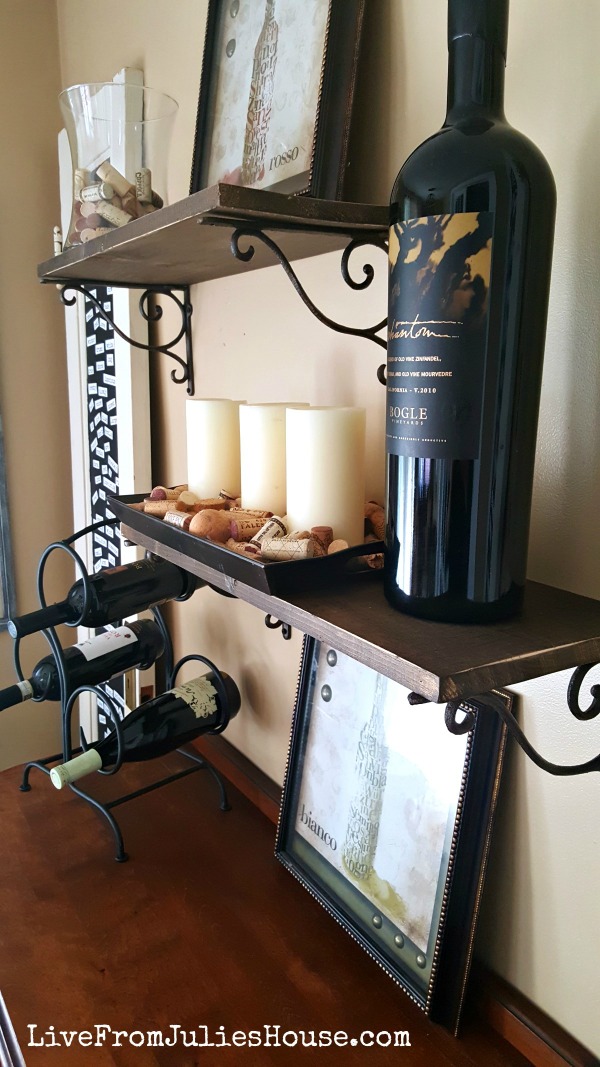
I’m still playing around with the arrangement on this wall….and yes, I realize it looks a little like a shrine to wine.
Which I guess it is. 😉 I’m okay with that.
This was kind of an oddball project, but I think I like it in this room, which is a little quirkier than the rest of my house.
What is YOUR best ReStore upcycle?
I can’t wait to see what everyone else came up with for the challenge! Be sure to check out the other projects by following the links below.
This link up is open to the 20 Upcycle Challenge Members only.
I’m linking this project up at some terrific blog parties – you can find my complete list of places I party HERE.


